Lachenalia in the Greenhouse
At the moment, a group of hybrid Lachenalia are in bloom. The bulbs were sent to me by a friend in South Africa. They came from several nurseries, mainly in the Western Cape Province, so far as I know. None had any details of parentage; they were just numberd: #1, #2, #3, etc. The ones currently blooming are mostly yellows.
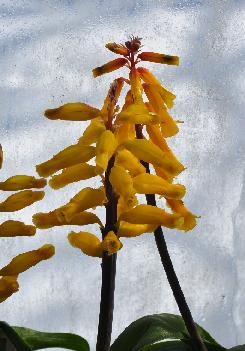
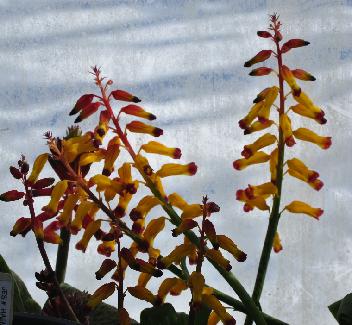
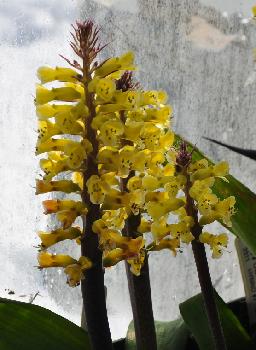

Lachenalia Hybrids from South Africa
Strelitzia reginae
I have some seedlings of Strelitzia reginae from open pollination of 'Mandela's Gold'. The seeds came from a friend's front garden in Pretoria, South Africa, in 2004. Three of the four plants are now showing flower shoots, their very first blooms. 'Mandela's Gold' has yellow bracts; one of the seedlings is going to have a colored inflorescence, but the other two might have the yellow forms. They should be in full bloom in another week or two.
Pollination Tools
The only way to be sure what you are getting when you produce your own seeds is to hand-pollinate the flowers individually. To do that properly, you need a few tools. The process breaks down into three phases:
- Collecting the pollen
- Storing the pollen
- Using the stored pollen for pollination
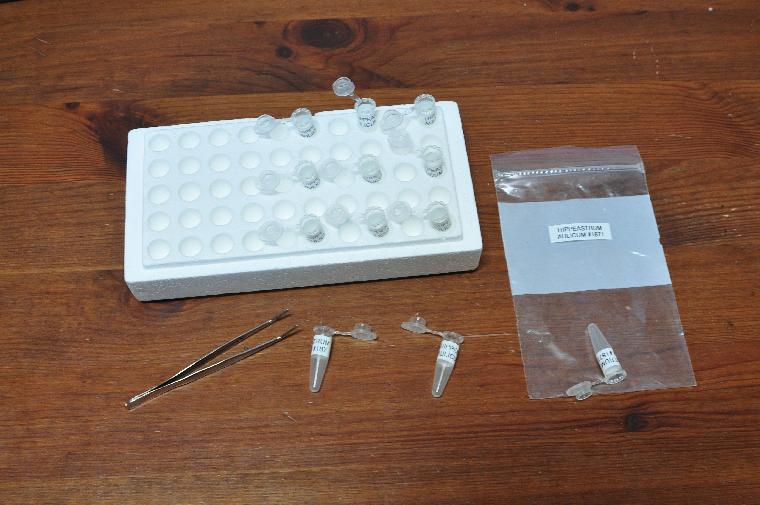
Tools for collecting and storing pollen
Forceps, microcentrifuge tubes, and styrofoam tray for handling the centrifuge tubes.
Zip top plastic bag for storing the sealed tubes in the freezer.
I use a steel forceps 5 inches long with angled tips to pull the stamens out of the flower. Separate the anthers from the fleshy filaments and keep the anthers in the 1.5-mL microcentrifuge tubes, also known as Eppendorf tubes.
If you want to store the pollen only for a few days, up to about a week, you can dry it in air overnight, then close the cap to seal it, and store the sealed tubes containing the dried anthers in a refrigerator.
To store pollen longer than a few days, it must be dried thoroughly. I use a drying box for this, one that can be sealed air-tight. Put a dish of drying agent -- blue silica gel crystals or commercial Drierite® -- in the dry box and set the open microcentrifuge tubes with anthers into the box. Leave sealed in the dry box for at least 24 hours. When dried, close the caps on the tubes tightly and store the sealed tubes containing the dried pollen and anthers in a freezer.
I prefer fine tipped camel's hair artist brushes for applying the pollen. Be sure to get brushes with soft hairs; avoid the brushes with stiff bristles. The ones I use are, I believe, size 0 (zero). The smaller the flower and its parts, the finer the tip of the brush needs to be. Choose your brushes accordingly. Sterilize the brushes in denatured alcohol or rubbing alcohol after using. You do not want to transmit fungal, bacterial, or viral diseases from one plant to another.
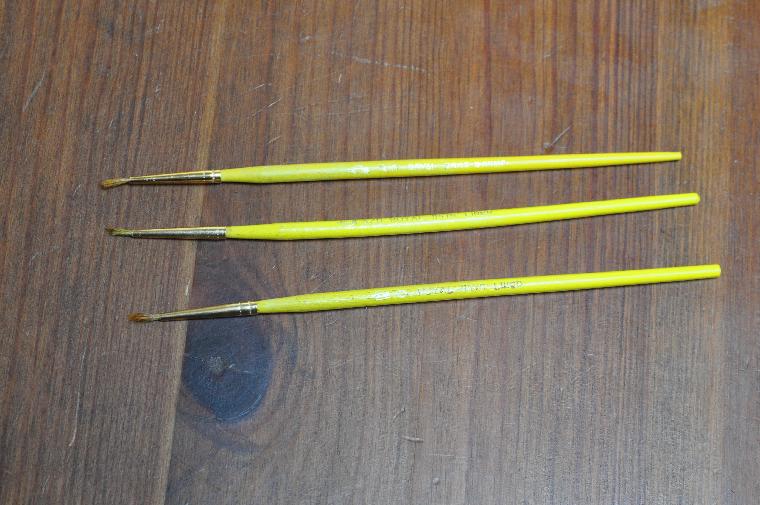
Artists Brushes for Applying Pollen
Size 0 soft brushes about 7 inches long overall
When pollinating, rigorous exclusion of extraneous pollen is absolutely required for genetics research and is a good idea for any breeding work. Open the flower bud before the anthers dehisce and remove the stamens with anthers. Then protect the stigma. I use small sheets of aluminum foil to cover the tip of the pistil.
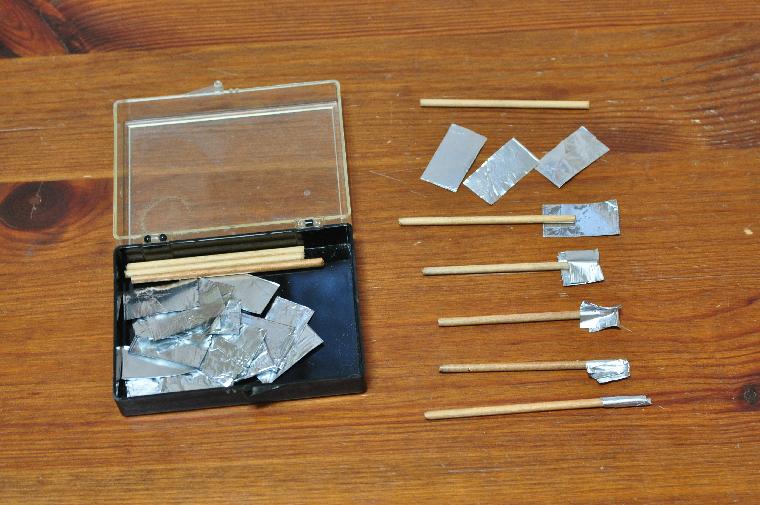
Protecting the Stigma
I use 1/8-inch diameter wooden dowel from a hobby shop, cut to lengths of about 3 inches. For flowers with stigmas wider than 1/8th inch, use a larger diameter dowel. Wrap the foil over the tip and roll it up. I use foil cut to 5/8 inch wide by 1-1/8 inch long; fold evenly over the tip of the dowel. Then roll the foil around the dowel. You should end up with a small aluminum cylinder closed at one end.
After applying the pollen, cover the stigma again with the small aluminum cap. Be sure to label the flower with a tag identifying at least the pollen parent. I always put both the seed parent (mother plant) as well as the pollen parent on the tag, and that tag stays with the ripe seed pod or berry after it is removed from the mother plant.
Why I Hate Gelatin Capsules
Gelatin capsules are the traditional containers for stored pollen. They have some disadvantages, however, and I don't use them because of these.
- When thoroughly dried, they become brittle and shatter easily when held too tightly between thumb and forefinger.
- In humid climates, like mine here in Indiana, the gelatin gets quite sticky, making accidents likely.
- Finally, although inexpensive, gelatin capsules purchased in large batches might draw the attention of narcotics enforcement agencies. Microcentrifuge tubes are simply better.
Good gardening, from here in central Indiana
Jim
Look up technical terms in the Glossary of Plant Biology